
feign client 사용해보기
Feign은 Http Client 도구인데 example을 보는 순간 직관적인 형태에 끌려 사용해보게 되었다. (RestTemplate, WebClient 등을 쓰다가 Feign을 써보게 되면 Feign만 쓰게될꺼다) Feign은 인터페이스와 annotation을 이용하여 아주 간단하게 요청을 날릴 수 있다.
- https://spring.io/projects/spring-cloud-openfeign
- https://github.com/isntyet/java-practice/commit/23d25624b5042ef32d5be814c82a8367d179dd2a
시작하기
feign을 사용하기 위해서 의존성을 추가해주자. Spring Cloud OpenFeign을 사용할꺼다. (옛날에는 Spring Cloud Netflix Feign 였으나, 현재는 오픈소스 프로젝트인 OpenFeign 로 변경되고 Spring Cloud OpenFeign 에 통합되었다)
우선 Spring Cloud 관련 패키지들의 버전에 맞는 의존성 자동 설정을 위해 spring-cloud-dependencies 를 사용해주자. 그리고 openfeign dependency도 추가해주자.
- build.gradle
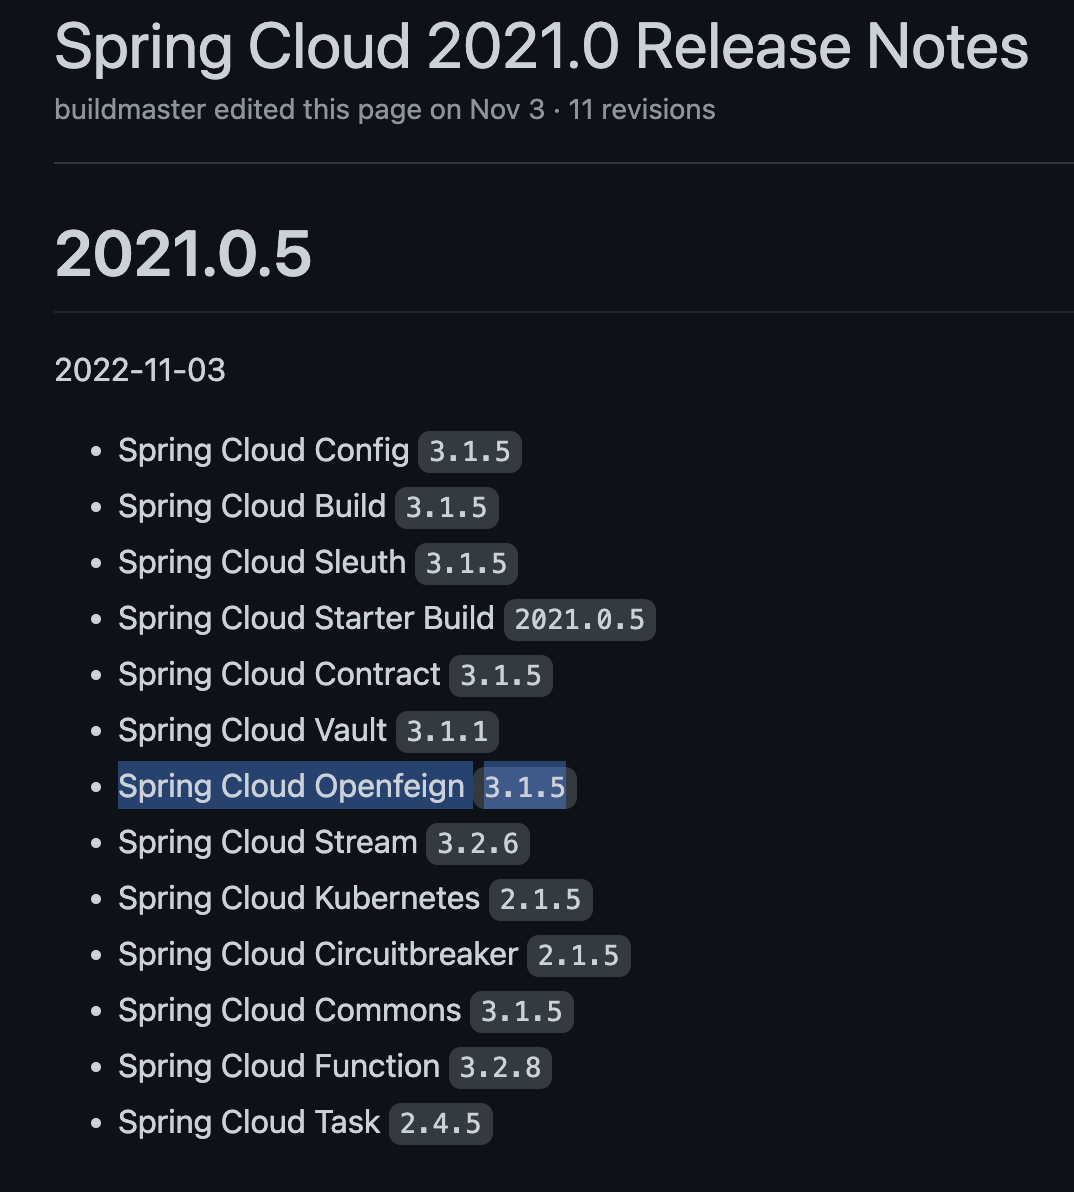
  // 참고: gradle 7.2 ,  Spring boot 2.7.2 사용중

  dependencies {
  	.
  	.
      implementation platform("org.springframework.cloud:spring-cloud-dependencies:2021.0.5")
      implementation "org.springframework.cloud:spring-cloud-starter-openfeign"
  	.
  	.
  }
Spring boot 버전에 맞는 spring-cloud-dependencies 를 써야하는데 나 같은 경우는 2.7.2 버전을 사용중이니 아래 사진처럼

2.7.x 에 해당되니까 2021.0.x 버전대를 사용해야하는데 2021.0.x 의 제일 최신 버전이 2021.0.5 이기 때문에 해당 버전으로 설정해줬다.참고 - https://spring.io/projects/spring-cloud
이렇게 되면 내 프로젝트의 OpenFeign 은 3.1.5 버전을 사용하게 되는거다.
-
OpenFeign 관련 컴포넌트 스캔을 위해 Application에 @EnableFeignClients 를 붙여주자
  @SpringBootApplication
  @EnableFeignClients // 여기
  public class PracticeApplication {

      public static void main(String[] args) {
          SpringApplication.run(PracticeApplication.class, args);

      }
  }
Application에 붙이기 싫다면 configration 파일은 만들어서 설정해줘도 된다
@Configuration
@EnableFeignClients(basePackages = "com.isntyet.java.practice")
	public class FeignClientConfig {
}
간단하게 사용해보기
먼저 최대한 간단하게 무료 API의 유저를 조회하는 API를 호출해보자.
내가 조회할 외부 API는 아래처럼 https://randomuser.me/api/?nat=us 를 호출하는 것 이다.
curl --location --request GET 'https://randomuser.me/api/?nat=us'
Response 형태는 대략 아래와 같다
{
    "results": [
        {
            "gender": "male",
            "name": {
                "title": "Mr",
                "first": "Juan",
                "last": "Thomas"
            },
            "location": {
                "street": {
                    "number": 706,
                    "name": "Brown Terrace"
                },
                "city": "Torrance",
                "state": "New Mexico",
                "country": "United States",
                "postcode": 86286,
                "coordinates": {
                    "latitude": "27.4589",
                    "longitude": "-104.4062"
                },
                "timezone": {
                    "offset": "-4:00",
                    "description": "Atlantic Time (Canada), Caracas, La Paz"
                }
            },
            "email": "juan.thomas@example.com",
            "login": {
                "uuid": "8e410e9d-5e03-4f61-8bc7-f91acb2b8b77",
                "username": "smallladybug981",
                "password": "redbull",
                "salt": "v6cl7yeX",
                "md5": "c8b57e7ceb81ff6fc37fcccea206ea1d",
                "sha1": "4c917b2e324f4067076ed1fd472512ef57792ab2",
                "sha256": "42f60f0a6a8ad6f23b21c367b418619b226894ee9291c58947150ba139ea18c2"
            },
            "dob": {
                "date": "1979-03-07T07:23:39.525Z",
                "age": 43
            },
            "registered": {
                "date": "2004-02-16T02:39:27.302Z",
                "age": 18
            },
            "phone": "(871) 757-4425",
            "cell": "(794) 866-7740",
            "id": {
                "name": "SSN",
                "value": "291-54-9615"
            },
            "picture": {
                "large": "https://randomuser.me/api/portraits/men/64.jpg",
                "medium": "https://randomuser.me/api/portraits/med/men/64.jpg",
                "thumbnail": "https://randomuser.me/api/portraits/thumb/men/64.jpg"
            },
            "nat": "US"
        }
    ],
    "info": {
        "seed": "c5e5e99edd73d274",
        "results": 1,
        "page": 1,
        "version": "1.4"
    }
}
- FeignClient 인터페이스 생성
@FeignClient(name = "userClient", url = "https://randomuser.me") public interface UserClient { @GetMapping(value = "/api/") GetUsersResponse getUsers(@RequestParam("nat") String nation); }name: FeignClient의 bean name (다른 FeignClient의 name과 겹치면 안됨)
url: 해당 client의 base url
@GetMapping(value = “/api/”): RequestMethod와 api Path - Response DTO 생성
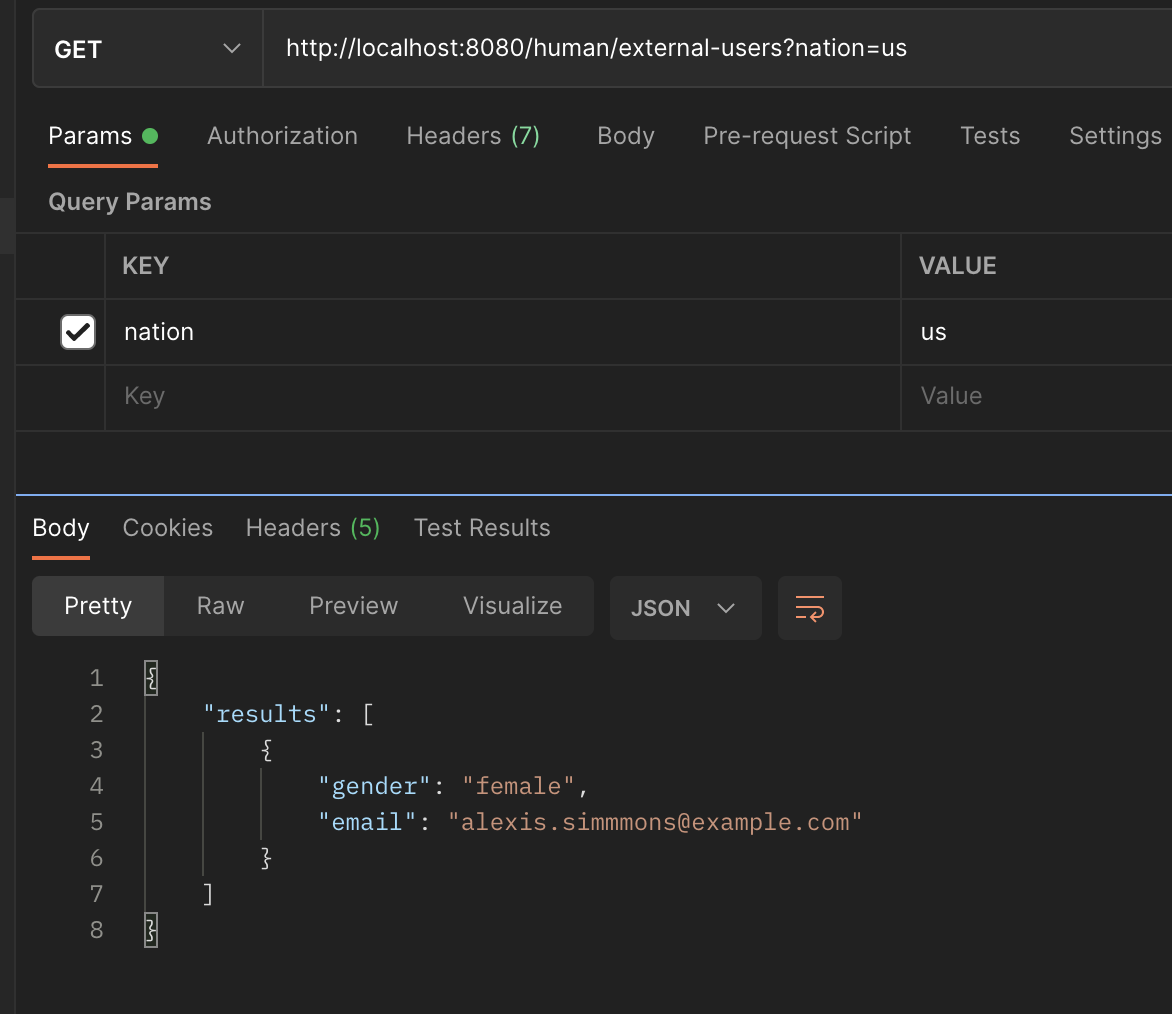
  @Getter
  @AllArgsConstructor
  @NoArgsConstructor
  public class GetUsersResponse {
      private List<Result> results;

      @Getter
      @AllArgsConstructor
      @NoArgsConstructor
      public static class Result {
          private String gender;
          private String email;
      }
  }
Response 에 정보는 더 많지만 귀찮으니 gender와 email만 받아오자.
이렇게 구현후 UserClient.getUsers()를 호출해주면 User 정보를 가져와서 GetUsersResponse에 담아서 사용할 수 있게된다.
아래 위에 구현한 FeignClient 인터페이스를 보면 알겠지만 엄청 간단하다.
그리고 얼핏보면 Controller 정의부분을 닮은 것 같기도하고, JPA Repository 와 비슷하기도 하다. (밑에 소스를 보면서 비교해보면 매우 눈에 익숙함을 알 수 있다)
- controller
@RestController @RequestMapping("/human") @RequiredArgsConstructor public class HumanController { private final HumanService humanService; @GetMapping("/external-users") public GetUsersResponse getUsers(@RequestParam(value = "nation") String nation) { var result = humanService.getExternalUsers(nation); return result; } } - jpa repository
public interface UserRepository extends JpaRepository<User, Integer> { List<User> findAllByNation(String nation); } - FeignClient
  @FeignClient(name = "userClient", url = "https://randomuser.me")
  public interface UserClient {

      @GetMapping(value = "/api/")
      GetUsersResponse getUsers(@RequestParam("nat") String nation);
  }
이렇게 구현이 간단한점과 친숙함이 장점이 될 수 있을 것 같다고 생각된다.
세부 설정
위에 구현한 것에서 더 나아가 보자.
1. url을 application.yml에서 가져오기
@FeignClient 에서 설정한 url을 application.yml 에서 가져올 수 있다.
- application.yml
external: user-service: host: 'https://randomuser.me' - FeignClient url 수정
@FeignClient(name = "userClient", url = "${external.user-service.host}")
2. Path 값 설정하기
- FeignClient
  @FeignClient(name = "userClient", url = "https://randomuser.me")
  public interface UserClient {

      @GetMapping(value = "/api/{nation}")
      GetUsersResponse getUsers(@PathVariable String nation);
  }
3. 다른 Request Method 사용하기
당연히 POST, PUT, PATCH 등 사용이 가능하다.
- HumanClient.java
@FeignClient(name = "humanClient", url = "${external.human-service.host}") public interface HumanClient { @PostMapping(value = "/human") CreateHumanResponse createHuman(CreateHumanRequest request); } - CreateHumanRequest.java (Requet body 정의)
  @Getter
  @Builder
  @RequiredArgsConstructor
  public class CreateHumanRequest {
      private final String name;

      private final Integer money;

      @JsonFormat(pattern = "yyyy-MM-dd")
      private final LocalDate birth;
  }
4. client에 커스텀 configration 적용하기
client마다 custom config를 적용 할 수 있다. 예를들어 해당 외부 서비스에 API 를 호출할 때 무조건 공통으로 들어가야하는 header가 있거나 공통 Response가 있어서 필요한 필드만 decode해오거나 등의 행위들을 할 수 있다.
ex) 해당 client에서 api 호출할 떄 마다 header에 값넣기
- HumanFeignClientConfig.class
public class HumanFeignClientConfig { @Bean public RequestInterceptor requestInterceptor() throws InterruptedException { return requestTemplate -> requestTemplate.header("header-name", "header-value"); } } - configration에 config 적용
  @FeignClient(name = "humanClient", url = "${external.human-service.host}", configuration = HumanFeignClientConfig.class)
  public interface HumanClient {

      @GetMapping(value = "/human/list")
      List<HumanInfo> getHumans(@RequestParam("name") String name);
  }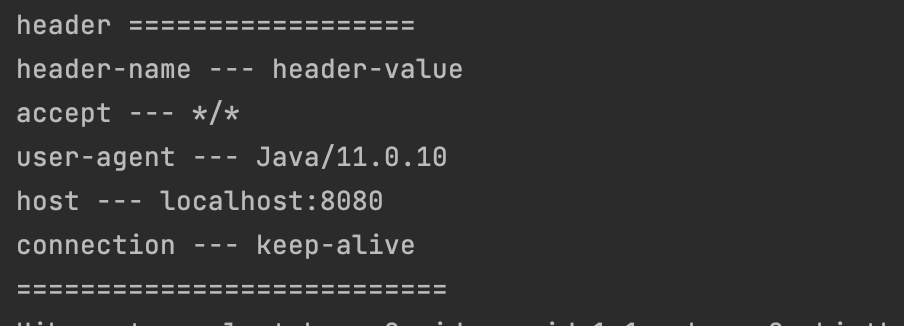
5. 공통 Response decode 하기
custom configration을 통해서 response body를 디코딩 할 수 있다. 예를들어 외부서비스가 아래와 같이 특정 포맷의 공통 Response를 사용중이라고 할 때
{
    "result": "SUCCESS",
    "message": "",
    "errorCode": null,
    "data": [
        {
            "idx": 1,
            "name": "jojo",
            "money": 3000,
            "birth": "1991-02-25",
            "version": 0
        },
        {
            "idx": 2,
            "name": "jojo",
            "money": 3000,
            "birth": "1991-02-25",
            "version": 0
        }
    ]
}
이런식으로 항상 response가 온다면 FeignClient의 Response dto를 만들떄 매번 공통 Response 형태로 만들어서 data를 가져와 사용해야 하는 번거로움이 생긴다.
공통 포맷이 아닌 해당 body를 조작해서 data의 값만 가져오게 Custom Configration에서 설정이 가능하다.
- HumanFeignClientConfig.class
  import com.fasterxml.jackson.databind.type.TypeFactory;
  import feign.FeignException;
  import feign.RequestInterceptor;
  import feign.Response;
  import feign.codec.Decoder;
  import lombok.Getter;
  import lombok.Setter;
  import org.springframework.beans.factory.ObjectFactory;
  import org.springframework.boot.autoconfigure.http.HttpMessageConverters;
  import org.springframework.cloud.openfeign.support.SpringDecoder;
  import org.springframework.context.annotation.Bean;
  import org.springframework.core.ResolvableType;

  import java.io.IOException;
  import java.lang.reflect.Type;

  public class HumanFeignClientConfig {

      @Bean
      public Decoder decoder(ObjectFactory<HttpMessageConverters> messageConverters) {
          return new HumanServiceDecoder(new SpringDecoder(messageConverters));
      }

      public static class HumanServiceDecoder implements Decoder {
          private final Decoder decoder;

          public HumanServiceDecoder(Decoder decoder) {
              this.decoder = decoder;
          }

          @Override
          public Object decode(Response response, Type type) throws IOException, FeignException {
              var returnType = TypeFactory.rawClass(type);
              var forClassWithGenerics =
                      ResolvableType.forClassWithGenerics(HumanServiceCommonResponse.class, returnType);

              try {
                  return ((HumanServiceCommonResponse<?>) decoder.decode(response,
                          forClassWithGenerics.getType())).getData();
              } catch (Exception e) {
                  return decoder.decode(response, forClassWithGenerics.getType());
              }
          }
      }

  		// 외부 서비스의 공통 Response 형태
      @Getter
      @Setter
      public static class HumanServiceCommonResponse<T> {
          private Result result;
          private T data;
          private String message;
          private String errorCode;

          public enum Result {
              SUCCESS, FAIL
          }
      }
  }
이렇게 커스텀한 Decoder bean을 생성해주면 공통 Response에서 원하는 부위만 가져와서 원하는 형태의 객체를 만들 수 있다. 마찬가지로 ErrorDecoder Bean을 만들어주면 에러 났을 떄의 Response Body 디코딩도 가능하다.
마치며
난 해당 OpenFeign Client를 현재 실무에서도 사용중인데 아직까진 별다른 이슈 없이 사용하고 있다. 그리고 내 기준으로 RestTemplate, WebClient를 쓸 때보다 훨신 가독성있고 편하게 사용하고 있는 중이다.
더 많은 기능, 설정법들이 있을것이므로 실무에서 새로운 설정이나 구현을 하게되면 그때 그때 해당 글에 업데이트할 예정이다.
Comments